
How to Adjust Windows for Winter? A Practical Guide
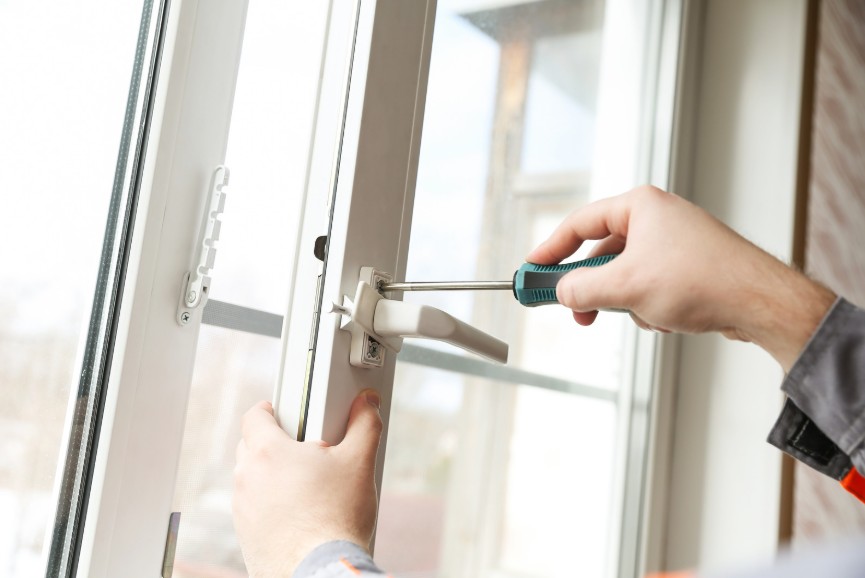
November is a great time to prepare your home for the colder months. Before temperatures drop, it is worth checking not only your heating system but also the condition of your windows. A properly functioning sash, intact gaskets, and the right seal pressure can reduce drafts and improve thermal comfort in your rooms.
How to Adjust Windows for Winter?
For many PVC windows, basic adjustment involves checking and potentially increasing the pressure of the sash against the frame using adjustment elements in the hardware. However, not every window features a so-called “winter mode,” and pressing the sash too tightly against the frame can impair its operation. Therefore, before making any adjustments, it is wise to first check the airtightness, gasket condition, and overall window operation.
Why Is It Worth Adjusting Windows Before Winter?
Proper hardware adjustment helps maintain the correct position of the sash relative to the frame and ensures adequate gasket pressure. It is particularly important when the window starts operating differently than before.
Signs that adjustment may be needed include:
-
A noticeable draft when the window is closed
-
Cold air felt near the frame
-
Difficulty closing or opening the sash
-
A handle that requires significant force to turn
-
The sash rubbing against the frame
-
Uneven gasket pressure
-
Visible sagging or misalignment of the sash
Keep in mind that simply “switching to winter mode” will not fix a worn gasket, an improperly aligned sash, or an installation issue.
How to Check If Your Window Needs Adjustment?
Before reaching for a key, run a few simple tests:
-
Check how the handle works: It should not require much force to close. If the handle offers noticeable resistance, the cause might be improper sash alignment or excessive pressure.
-
Check if the sash rubs against the frame: Open and close the window a few times. Pay attention to whether the sash moves freely and whether it catches on the frame anywhere.
-
Look for drafts: With the window closed, feel along the edges of the gasket with your hand. You can also perform a simple paper test: insert a sheet of paper between the sash and the frame, close the window, and try pulling the paper out. If it comes out significantly easier in one spot than in others, the pressure may be uneven.
-
Inspect the gaskets: They should be elastic, crack-free, and properly seated. A flattened, brittle, or damaged gasket can cause leaks regardless of the hardware settings.
How to Adjust Windows for Winter Step-by-Step?
In many cases, basic adjustments can be done on your own. However, keep in mind that the method depends on the specific hardware system used. Different windows may feature different adjustment elements and require different tools.
-
Step 1: Open the sash and locate the adjustment elements
After opening the window, you will see metal hardware elements along the edges of the sash. Depending on the system, these may include locking cams or pins, often shaped as small eccentric elements. These components are responsible for how the window locks and how tightly the sash presses against the frame.
-
Step 2: Check the current setting
Some elements feature a mark, notch, dot, or flattened side to help identify their position. However, do not assume that a specific mark position always means “winter mode.” Interpretation depends on the type of hardware. If you are unsure, consult the documentation from the window or hardware manufacturer.
-
Step 3: Increase pressure gradually
If the hardware system allows for pressure adjustment, make changes in small increments. Depending on the design, you may need an Allen key, a Torx key, a flat spanner, or a specialized tool. If you are adjusting multiple locking points, set them evenly. Do not tighten one element to the maximum just because you feel a cold draft in that specific spot.
-
Step 4: Check the results
After adjusting, close the window and verify:
-
Whether the handle turns smoothly
-
Whether the sash closes without excessive force
-
Whether the gasket is pressed evenly
-
Whether the noticeable draft has disappeared
-
If the window becomes harder to close, it does not mean the adjustment is better. Excessive pressure can strain the hardware and gaskets.
Important: Adjusting the pressure is not the same as adjusting the sash position. If the sash has sagged, rubs against the frame, or is clearly misaligned, adjusting the hinges and other hardware elements may be necessary. In such cases, it is best not to randomly adjust several points at once.
Winter Mode in Windows – What Does It Mean?
“Winter mode” is primarily a colloquial term for a hardware setting that provides greater pressure of the sash against the gasket. It is not a universal switch present in every window. In windows equipped with adjustable hardware, you can alter the position of the locking elements and, consequently, the force with which the sash adheres to the frame.
However, this does not mean every window needs to be set to maximum pressure before winter. If the window is properly adjusted and airtight, additional pressure may be unnecessary. It could also cause greater resistance on the handle and accelerate gasket wear.
Therefore, it is better to think of “winter mode” as checking and potentially correcting the pressure, rather than a mandatory task to be performed twice a year.
What to Do If the Window Still Lets Cold Air In?
If cold air still leaks through after adjusting, the cause might lie elsewhere.
The most common causes include:
-
Worn or damaged gaskets
-
Improperly aligned sash
-
Worn or damaged hardware
-
Hinge issues
-
Leaks at the junction between the window and the wall
-
Installation errors
-
Deformation of the window frame/sash components
Simply changing the pressure will not repair a damaged gasket or fix an installation flaw. If drafts occur in only one spot, the sash has noticeably sagged, or the handle is very stiff, it is best to stop further DIY adjustment attempts and call a professional.
How to Prepare Windows for Winter?
Adjustment is only one part of preparing window joinery for the heating season. In autumn, it is worth going through a simple checklist:
-
Clean the hardware: Remove dust and dirt from moving parts.
-
Inspect the gaskets: Check for cracks, dry rot, or deformation.
-
Check the pressure: Ensure the sash adheres evenly to the frame.
-
Verify airtightness: Look out for drafts and variations in resistance during the paper test.
-
Check handle operation: It should operate smoothly without excessive resistance.
-
Maintain moving parts: Lubricate according to the hardware manufacturer’s recommendations.
-
Don’t forget ventilation: Maximizing window tightness does not replace proper indoor air exchange.
If the window components are heavily worn or leaks cannot be resolved through adjustment and maintenance, it is worth having the overall condition of the entire window evaluated, not just its hardware.
FAQ
1. Can I adjust windows myself?
Basic pressure adjustments on many windows can be done on your own. However, if the sash has sagged, rubs against the frame, the handle is stiff, or you are unsure how the hardware works, it is safer to hire a specialist.
2. Why is cold air blowing through even when the window is closed?
The reason could be incorrect pressure, a worn gasket, improper sash alignment, hardware damage, or a leak where the window meets the wall structure. If adjusting the pressure does not help, you need to look for another cause.
3. When is adjustment needed, and when should the gasket be replaced?
If the gasket is elastic, undamaged, and properly seated, check the adjustment first. If it is cracked, stiff, deformed, or visibly worn out, adjustment alone will not be enough.
4. How often should windows be adjusted?
There is no single schedule suitable for all windows. Adjustment is performed when symptoms of improper operation appear or when recommended by the manufacturer of the specific system. However, it is good practice to regularly inspect the condition of the hardware, gaskets, and overall sash operation.






Ask for a free measurement and quote
Wypełnij formularz, jeżeli chcesz umówić się na bezpłatny pomiar*, wycenić okna lub dowiedzieć się więcej o konkretnym produkcie.
Nasi specjaliści skontaktują się z Tobą i odpowiedzą na Twoje pytania.
*Bezpłatny pomiar dokonujemy wyłącznie na terenie Poznania oraz okolicy (do 20 km). Powyżej 20 km od Poznania pobierana jest kaucja za pomiar. Kaucja zwracana jest w momencie podpisania umowy.